Monday, July 15, 2013

#august2august.

If you've been following me for any time at all, you know I am a bit of a calendar freak. I posted here, here, and here about my curriculum calendar for school, and here about my personal planner and calendar. It would be a bit of an understatement to say that I "like" to have things planned out - it's more like "obsessively". The upside of this disorder is that I rarely double-book or run tardy for the party; the downside is....is there one? Who wants to be the chick that's always late or always cancelling and re-scheduling? Not me, amiga.

Wanting everyone to join the planning party, I decided to create an August-to-August calendar and planner for the 2013-2014 school year! Even with my snobbishly persnickety taste in calendars, I think this one turned out pretty fabulous. Your August-to-August calendar and planner comes with a super chiq front and back cover:

...and yearly overviews of 2013 and 2014.


Each month (August 2013 through August 2014) has its own "monthly overview page" complete with a monthly "to-do" list, "notes" section, and previews of the months before and after the current month.

Behind each month's overview page, there is a weekly agenda spread out over two pages so that you have plenty of room to note all meetings, appointments, birthdays, parties, and even plan your evening's dinner!

Each of these weekly agendas are headed by a fabulously color-blocked month title:

Finally, there are several pages for various notes and lists you might be making throughout the day and week! You are free to print as many or as few of these pages as you would like to fit your specific planning needs!


So what does this butte look like all put together? I chose to go the Martha route and grabbed up some goodies from Staples for my calendar:

As you can tell, I grabbed a one-inch binder, tear drop stickers, a clear pouch, and a pack of bundling bands! Oh, Martha, the things you come up with! I chose to print my calendar pages on cardstock for extra durability and front/back so that it would have a nice layout. Once put together, my calendar looked positively peachy!

My pens, stickers, and a notepad went in the pouch while the binding bands and extra binder clips went in the binder's pocket. I also chose to make dividers for each month using these self-adhesive tabs from Office Depot:


Obvi, my planner opens with the cute cover page:

...and then continues with month views and weekly agendas throughout the school year!


The back of my binder has several copies of the lined note pages for me to begin filling out come August.

So, what do you think? Ready to get planning and be Punctual Polly? Yes, I thought so. Head on over to my TPT shop to grab your own copy of the August-to-August calendar! I promise you (and your friends and family) won't regret it! Go on, now. Get shopping!

Thursday, July 11, 2013

girl in the tree house. {office revamp, part one}

As I told y'all the other day, our office recently underwent a small transformation to allow me to do a bit more work from home without cramping the Mr.'s style too badly. Despite my tireless efforts to keep the office appealing to both the male and female inhabitants, I concede that I may have allowed my fondness for all things shiny and gold to take the reins a bit in this space. But just a bit. Certainly not enough to force Mr. Spouse to call this little projecto "The Girl in the Tree House" room, right? #youbethejudge

We started off with the Mr.'s office looking very Don Draper-esque with his roll top desk, Yankee paraphernalia, Chesterfield sofa, and bar cart.


In order for the two of us to be able to work in the office at the same time, we knew that we were going to have to ditch the roll top {#thankscraigslist} and find a larger, more open workspace. You'll be shocked, SHOCKED to hear that I went to Ikea to find said workspace. At the Swedish haven, I snagged two Lerberg Trestle legs...
...as well as two (yes, two) 47 1/4" long Linnmon table tops in high gloss white.
We went with two table tops so that we would have a nice, long, 94" desktop/workspace - plenty of room for two computers, two work areas...and a girl in the tree house. 

You may have noticed I only bought two legs for our extra-long table! That's because I wanted to use these as the center "brace" of the table:

Cute, right?! Stop being jealous. I really wanted to bring our filing cabinets out of one of our closets and into the office so that they'd be easier to access, thereby encouraging me to file away important paper a bit more frequently than once every 8 months. #truestory The only problem was that the filing cabinets were 3 inches shorter than the trestle legs I bought at Ikea. If I wanted these filing cabinets to help support my table tops, I needed everything to be the same height. Solution?

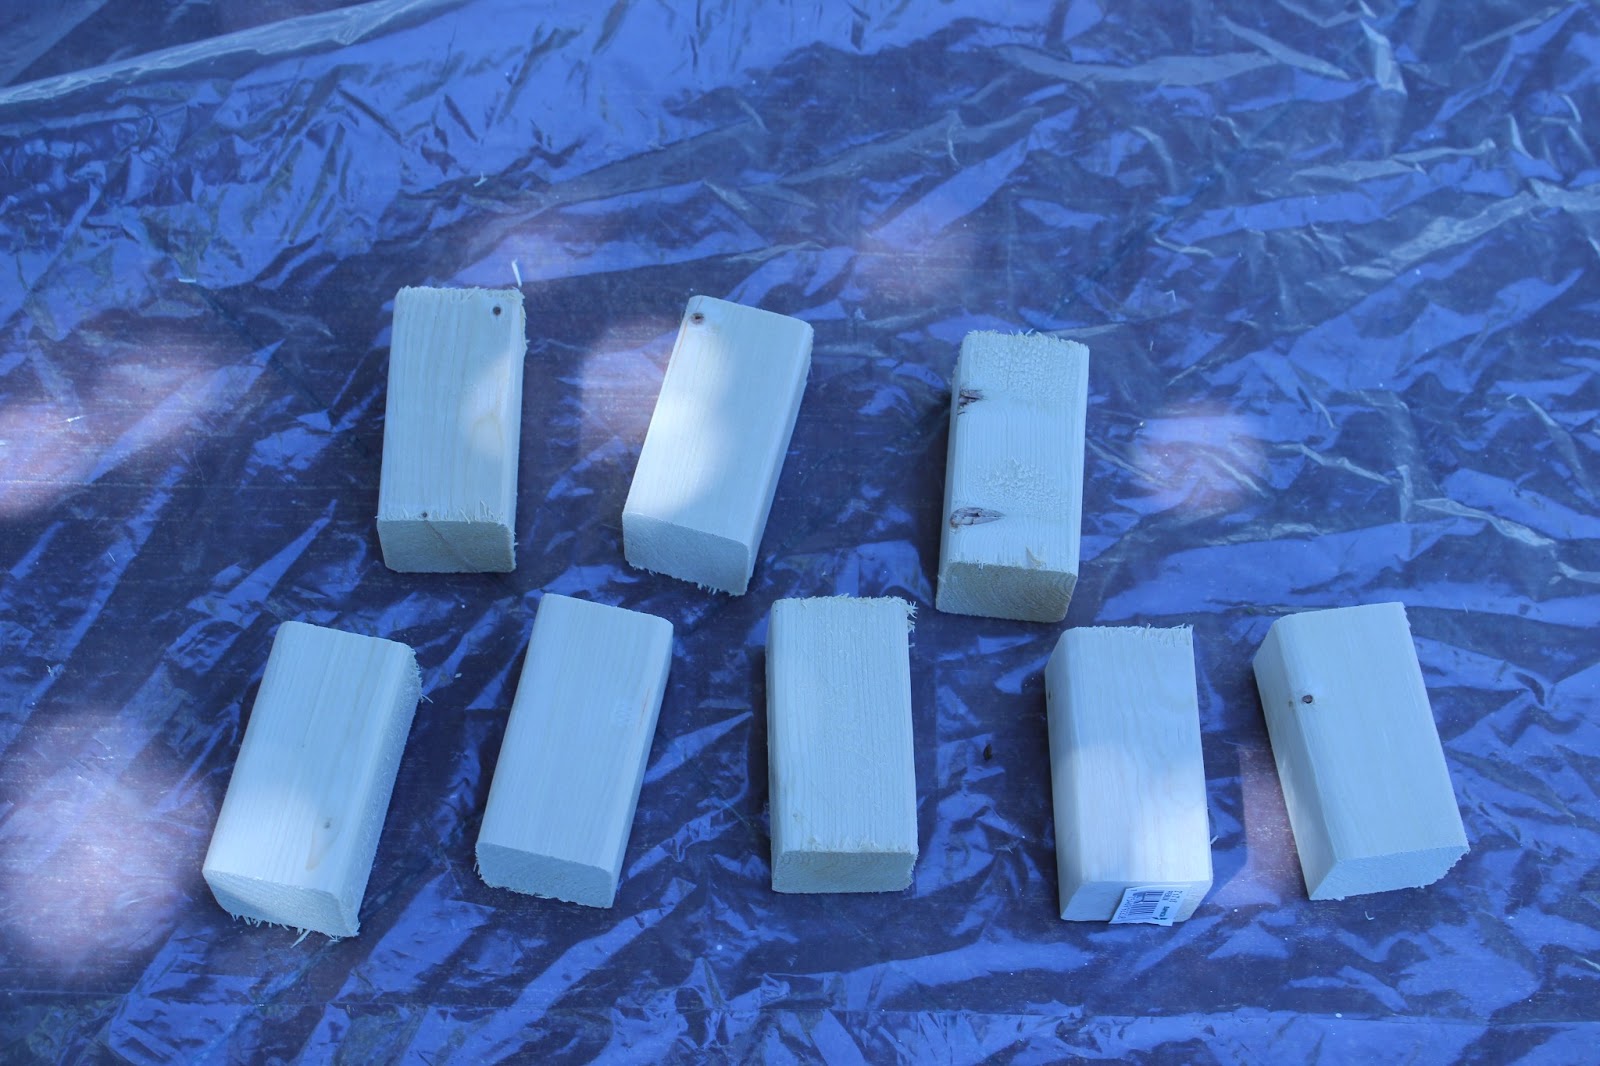
Eight 2x2s lovingly cut by the gentlemen at Home Depot to 3 inch lengths. Supplies in hand, it was finally time to PAINT! I painted the body of the filing cabinets using some leftover white satin spray paint to give them a bit of a fresher look. I chose to spray paint the trestle legs from Ikea. the wooden blocks for the filing cabinets, and the filing cabinet's pulls in Rustoleum's "Gloss Gold".

Once the paint on the wooden blocks had dried, it was time to affix them to the bottom of the cabinets. For this, I used Loctite's Epoxy in the quick set formula so that the legs would be set after only ten minutes {instead of four hours}. 

I mixed the epoxy in a disposable plastic cup with a popsicle stick...

...and quickly applied a nickel-size amount to each of the four wooden blocks, then placed one wooden block on each corner of the filing cabinet.


While the legs were drying, I re-installed the newly painted gold pulls, and after letting the legs set for about an hour {just to be safe}, I moved those puppies inside!

I love the little pop of gold on the cabinet pulls and legs and trestle legs!

{sorry for the dark pictures, pals, the lighting in this room is a bit tricky for this non-photog}

To give us a bit of added storage {and for the chance to add just a bit more gold to the space}, we also bought a pair of the Vittsjo Shelving Units from Ikea...
...painted them in the same Rustoleum Gloss Gold, and loaded them up with the decor of our choice my choice. On my side, I put all of my writing and office supplies...

...as well as my printer and Silhouette!

On the Mr.'s, I put his Yankee gear...

...as well as his office supplies {oh, and MORE Yankee gear}!

So far, we are tickled, well, gold, over our new office space! I can't say that I mind being a girl in this tree house.


Next up, lighting! And oh, what a transformation we had!

Wednesday, July 10, 2013

coming soon.

Get your highlighters, color-coded pens, and post-its ready girls, the August-to-August calendar is almost ready!

I've been working on a 2013-2014 personal planner all day and simply had to share a sneak peak with y'all. I'm praying that SOMEONE out there will be as excited as I am about this little diddy. #bueller?

It will feature 2013 and 2014 yearly calendars...

month views...

...and week views, complete with a place to plan the most important meal of the day! Sorry Kelloggs.

I'm thinking this guy is going to look dashing in a new Martha Steward Discbound Notebook from Staples, no?

Be still my arrhythmic heart. Stay tuned for the big reveal early next week....if not sooner!

Tuesday, July 9, 2013

ch ch ch changes.

Summer, glorious summer, what have you done with my work ethic?! Back in May, I dreamed and dreamed of those long summer days that I could spend creating and blogging until I could create and blog no more. Instead, I've been doing a whole lot of this:
Princesses, housewives, realtors, chefs, here's what I have to say to you:
Thanks a bunch, Bravo.

Despite my best, bravo-rrific attempts to avoid work, I have managed to get one thing checked off my to-do list this summer: the office. But before we dive into any before and after shots of the office, I should probably tell you why this little room was on my agenda in the first place. Come September 2013, I will no longer be teaching first grade! Instead, I will be doing my very best to impart wisdom, knowledge, and a general understanding of finger painting to two and three year olds at a local preschool! Further, I will be spending the couple of extra hours I gain from the shorter preschool day to follow in my dad and grandfather's footsteps! My grandfather was an incredibly talented artist who specialized in the creation of calligraphied and watercolored scriptures - a product our family dubbed "Scripture Pictures". Here's an example of my grandfather's work:

My goal is to take some inspiration from my grandfather's work and create a more modern line of Scripture Pictures that will feature updated calligraphy and graphics! Mr. Spouse and I are super jazzed about this next little adventure in our lives!

So there you have it, a new business venture requires a new office. Duh. So let's get right down to it. Before, the office was Mr. Spouse's man cave rife with rich mahogany, leather-bound books, and an award-winning collection of Yankee memorabilia.


While I didn't really mind the decor of the space, the simple fact was that there wasn't enough room for me to share the Mr.'s desk with him, and my desk area....
...wasn't going to be large enough to hold my new computer and printer. Ergo, new office space must be created with ample room for the Mr. and me to TCB (take care of business, to the layperson).

We went from this:

To this:

And from this:

To this:

Over the next few days, I will walk you through each component of the space, but for now, here's some close-ups of my work area...


...and Mr. Spouse's work area...

{Yankees gear still in tow...}

The bookshelves also got a little girly love.


Even though the Mr. still maturely announces "Girl in the treehouse!" every time I enter our office, I'd say we both got exactly what we needed from this little room, don't you think?

Stay tuned over the next few days for a full breakdown of the creation of our desk space, shelving units, and lighting for the oficina!