Tuesday, January 31, 2012

dvd love.

Happy Tuesday! I wanted to drop by for a quick update on our DVD storage. I want it to be an encouragement to you that even small, quick tasks can make a big difference!

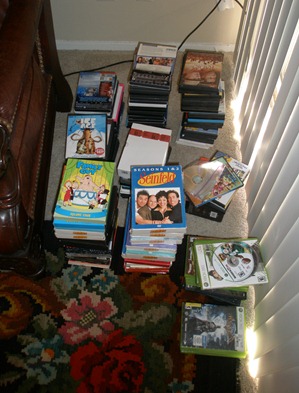
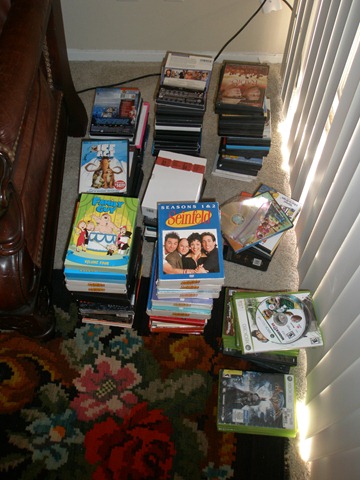
You might recall that in one of my very first posts, we visited our newly compact DVD collection. We went from this…
003

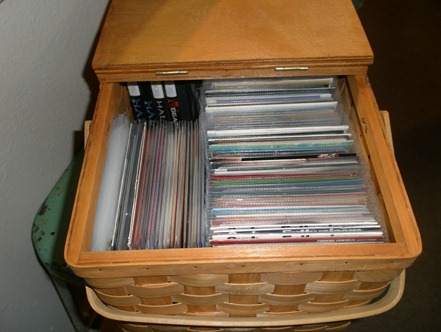
…to this…
013

…with the help of these
  020019

Victory indeed! We LOVE our new set-up! But it was still lacking something…something that every good storage solution has…I know you’re shocked…labels! We needed some way to quickly navigating to the DVD we needed, and searching one-by-one through each DVD was not it!
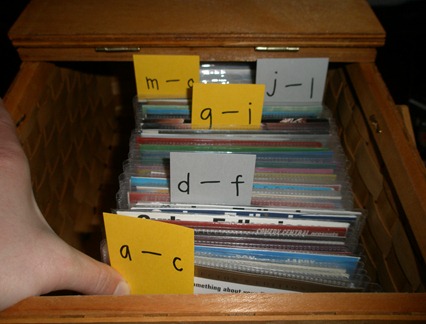
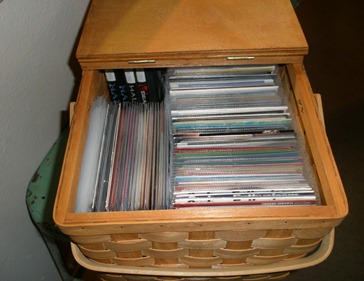
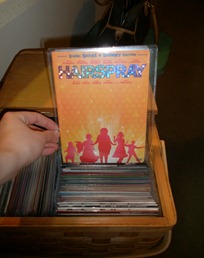
I quickly typed up some alphabetized dividers and printed them on heavy cardstock in alternating colors (there’s no need for dividers to be ugly!). I then inserted the dividers into the basket and…
004

…hallelujah! Now we can find our DVD’s quickly and easily making our DVD storage transformation complete! We are thrilled with the results!

This is a short post, but I want it to prove that not all organization transformations have to be revolutionary! Small, minor improvements may take just minutes to complete, but can create big changes! This task took me no longer than 10 minutes to accomplish, but it made such a big difference in our DVD storage!

What small tasks can you take on today that will make a big difference for you and your family?

Monday, January 30, 2012

christmas in january.

Yes, it's true! Christmas is still alive and well here at our casita. We just love Christmas a bit too much to let it go. Our tree is down, garlands are stored, and presents have been well-used, but we still had one thing out: our Christmas cards. While I have loved letting Christmas live on for the past month, the truth is, I was waiting for those last "Happy New Year" cards to get in before I started brainstorming storage ideas.

Throughout the most joyous of seasons, our Christmas cards lived here...
 ...sitting in a cookie tin one of my sweet kiddos gave me for Christmas on our coffee table! We loved having our cards out and ready to be perused throughout the holiday! I mean, who doesn't love looking through all of the Christmas cards?! It's one of my favorite pastimes.

Using this tin worked perfectly for us this year because it did not take up a lot of space, all of the cards were corralled into one space, and the tin SCREAMS Christmas!

But since February arrives on Wednesday, it was time to start putting those pieces of eye candy away until next year. As I thought about ways to store our cards, I knew that I wanted the cards to be bundled together and to figure out some way to include the year on these cards so that in the future, when we pull out our Christmas cards, we can know when the little treasures were delivered. You know what that means: labels!!

After piddling around for a bit, I created this.
I know, it looks like a lemon meringue pie threw up on my label, but when it printed, the lemony green turned out a couple of shades darker = perfection. After throwing on a little cardstock backing and giving it a scalloped edge, we ended up with...

I decided to bundle the cards together using a binder ring. Although this meant having to punch a small hole in each card, I found that all of our cards had an area that could be punched without defacing the card. After punching holes in all of the cards, our Christmas Card Collection for 2011 will looks like...

All set! Now, I will probably throw them in a Ziploc bag to protect from scratches and tears and place our cards in our Christmas storage containers (a post on that will be coming up later!).

I am so looking forward to pulling these out again for Christmas 2012 and sharing our memories with friends and family! How do you store your Christmas cards from year to year? Did you have any fun displays this year?

Sunday, January 29, 2012

free the freezer.

I don't know about your house, but at our house, the freezer gets the short end of the stick. What should I do with all of this leftover spaghetti sauce? Throw it in the freezer. Man, I wish this Diet Dr. Pepper would get cold faster! Throw it in the freezer. I want to make muffins, but can't eat them all in a week. Throw them in the freezer. Mr. Spouse wants a cool t-shirt for his summer bike ride. Throw it in the freezer. When in doubt, we (shocker) throw it in the freezer.

Being that our freezer is used so often, we needed it to be a functional space. But it's so hard to keep bags of chicken breasts, racks of smoked ribs, tubs of muffins, 5 pound bags of flour, bags of chocolate chips, and frozen soups and sauces neat and orderly. Nothing is the same shape and everything is used frequently, so it's hard to decide which items need to be in the front and which items can be tucked away.

So what's a girl to do when she needs inspiration for a freezer intervention? Pinterest it.

Jackpot.

I first found this idea from Better Homes and Gardens. I loved the idea of categorizing all of my freezer items and placing them in labeled bins.

Next, I saw Jen's freezer over at I Heart Organizing. I liked how she put all of her smaller, bagged items into bins on the top shelf of her freezer which left her bottom shelf free for the bulkier items.

I had my inspiration, now it was time for my favorite part: shopping! I measured the height and width of both of my shelves, grabbed my keys, and booked it to the Bin Mothership: Wal-Mart. There, I found two different types of bins that would be a magnificent addition to our freezer!

The first bin was perfect for the top shelf of my freezer - it was deep enough for storing my bulky items, but narrow enough for 2 bins to fit on the shelf.

The second type of bin was the absolute perfect height to fit underneath the shelf, creating added storage on the bottom level of the freezer. It was also narrow enough to allow for two bins to fit side-by-side! I mean, P.T.L.
I had my bins, so now I wanted to follow Better Homes and Gardens's lead and categorize my freezer items. I found that all of our items fit into 3 categories: baking, meals, and meats. But, no bin is complete without a label! After printing, laminating, and hot gluing the labels onto the bins, I placed all of the items into their respective bins with this result:

Be still my organizational heart! The "meals" bin holds any sauces, stews, and breads that I have frozen for a future occasion. The "baking" bin holds bags of chocolate chips, nuts, and various flours. Lastly, the "meat" bins hold our frozen chicken, ribs, ground turkey, etc. Victory!

I am obsessed with our organized freezer for a couple of reasons. First, by storing all of our items in the bins, we have freed up our door shelves for any one-time freezer purchases, ice packs, and the occasional t-shirt. Second, I no longer find myself taking every single thing out of the freezer to find one item in the back; the bins are easy to remove so that I can quickly find what I need! Third, everything has it's place! I love, love, love when everything has a home so I always know if something needs replenishing and what is available to use.

Do y'all use your freezer as much as we do? How do you keep it organized?

Wednesday, January 25, 2012

planning makes perfect.

Everyone that knows me knows I'm a planner. Like an obsessively nerdy kind of planner. If it's not on my calendar, it's not happening. It's kind of a problem. This trait is flushed out at school in my lesson plans. One of my absolute favorite things to do is school is PLAN! I know, right? Who actually likes writing lesson plans? That would be me.

When I was in second grade, I asked for a lesson plan book and grade book for Christmas so that I could be JUST like my second grade teacher. I could not WAIT to plan activities, crafts, writing topics, and reading responses! As much as I loved my lesson plan book when I was a tike, I have found that the store-bought planners are just not for me. During my student teaching experience, I found out so fast that I spent more time crossing out subject/content areas in my store-bought planner and replacing them with the subjects I would actually be teaching than actually planning those subjects. Not. OK. There are too many changes in schedules, special classes, performances, and overall mayhem in a first grade classroom to be wrangled into a mass-produced, spiral-bound planner.

The result of this ban of store-bought was me creating my own planner. For my first two years of teaching, I created a new lesson plan book over the summer that contained my unique schedule and outline of the day, had it printed and bound, and plotted my revenge on the store-bought tycoons. But this past summer, I decided to try a little something different. I decided to eliminate the spiral-bound book, save some space on my desk, and try to plan each of my lessons on the computer weekly. I felt like I could utilize the otherwise empty space on the side of my filing cabinet and display my lesson plans on hooks or magnets. Going digital AND save precious desk space? Yes, please.

I spent the next couple of days copying, pasting, cropping, and inserting to create the perfect lesson plan format for me and my kids. Click the picture below to see the entire plan!

I then print my lesson plans each Friday and hang them from two Command Hooks here.

I LOVE the arrangement! I love that I my plans are constantly right in front of my eyes and always watching to make sure I don't deviate from them too much. But everyone who knows anything about teaching elementary school knows that a day in the life of a first grader can't just be written on a plan and then magically result in a fabulous lesson! There are books, papers, craft supplies, visuals, posters, diagrams, and much much more that makes those lessons actually happen. I needed a place to corral all of this good-ness! I had seen this file system from Lakeshore for $50, but I knew I could accomplish the same idea for cheaper!


To Office Depot I go! I was not disappointed in my finds.

I purchased five clear magazine files and twenty folders in five different colors (one color for each day of the week). How much did I spend? $15, good sir. Total savings: $35. I labeled each magazine file with the day of the week and then labeled each folder with the content areas taught each day.

As I plan for each week, I file any papers, station activities, games, books, etc. that I will need for that subject area in the folder for the particular day. The beauty of this system is that all of my supplies are within reach, making transitions smooth and efficient, but if an activity does not get introduced, I simply move the folder to the next day! Easy peasy!

I adore my lesson planning system! It has multiplied my love for planning each week ten-fold! But enough about me - how do you plan? What works for you?

Monday, January 23, 2012

the superhero room.

One of the joys of teaching first graders is that I get to utilize every single color of the spectrum without fear that it will ever be "too much". If I had as much color in my house as I have in my classroom, I think I would be an excellent candidate for TLC's "Trading Spaces". But to a first grader, if every color of the rainbow is not in their immediate line of sight, they consider the space to be useless - "muted color scheme" is not in their vocabulary.

With that said, welcome to the Superhero Room. I snapped a couple of quick shots of the room to give you an idea of what our room looks like on a day-to-day basis. I wanted to give you just a quick overview of our room, and later we will dive into more specific areas of the room that either work or still need help!

As soon as the kids walk in, this is what they see - it's our main "drop zone". They stop and turn their homework in, submit any notes from home, choose their lunch for the day, and turn in their library books. It's a one-stop-shop. It is so helpful that it's right inside the door, because the kids don't have the chance to miss it!

The main focal point of our room is our front wall - it holds our alphabet and digraph cards, our ActivBoard, our calendar board, and our Bucket Fillers. If the kids need to know anything, it's on this wall!

Here is a close-up shot of our calendar. We complete our Morning Meeting and all of our Morning Jobs on the ActivBoard, but this board is always a reference point for finding the date, the day of the week, types of weather, etc. It also houses our coin posters.

Here is our Superheroes board which is our main spot to display student work. This wall also has three clocks that show important times in our day that the kids are always asking about (lunch, specials, and dismissal). It also houses our "pledges" to one another, or our class rules, as well as our patched-up heart which serves as a reminder that we will always use our kind words! 


Right below our Superhero board are our math tubs where we can always find any math manipulative we could ever dream of! The tubs are clearly labeled so that the kids can easily find whatever tool they need.

We spend a whole lot of time in our next area: Word Work! I love that all of our tools to help us spell and be good writers are right in this area. Our Word Wall is in this area, as well as our Sound Board which shows all of our first grade spelling patterns! This is also where the kids come for their Word Work rotation. All of the supplies they need are in the bookcases and drawers!

Our next stop is the Teacher Table where the kids come for reading groups. Right behind my table, I have all of my Guided Reading materials (multiple copies of books, our Journeys series, etc.) so that everything I need is within reach. This space is functional, but I am definitely anxious to make it more organized and "clean" looking!

Right next to our Teacher Table is my desk area and our Genre Board where we display all of the books we have read together this year classified under their respective genre.

The final stop on our tour is our world famous Reading Loft! This is one of the highlights of first grade! Each first grade classroom has a Reading Loft that houses their classroom library and also serves as a reward system for reading at home. Students earn days up in the loft by reading a certain number of minutes at home with their parents. The kids LOVE it! 

The library underneath it, however, is the bane of my existence. I have tried so many different organizational systems in this area, and no matter what we try, the kids have such a hard time maintaining it. We've tried buckets categorized by author and subject, shelves for varying reading levels, etc. You can see that books are hanging off the shelves, stacked on top of each other, and squished so tightly that the kids can't see what books are available. This is a project that I am hoping to take on as soon as I can find a new system that might work. Any ideas?

So there's a tour around the Superhero room - lightning round style. There is so much work to do to make it more functional and easy to maintain for the kids! I definitely have a lot of room to grow. Let's say that this post serves as my pledge to start researching better ways to organize all of our room's spaces so that the kids can enjoy our room to it's fullest!
Sunday, January 22, 2012

spice it up.

With the pantry overhaul complete, I turned my focus to the ever-troublesome spice rack. My grievances with my old spice rack were thus: all different bottles (some with red caps, some with black caps, some tall, some short, some flip top, some screw top...catch my drift?), difficulty removing and replacing bottles on the three-tiered tray, and labels that were sometimes hidden or too small to read without picking up the bottle. This constantly growing list of awfulness would not jive with the new fabuliciousness of the pantry.

I have never ever been a fan of over-the-door hanging organizers, but our space constraints in the "little kitchen that could" were demanding it. So Mr. Spouse and I headed back, once more, to Wally World where we found one of these lovelies and while Mr. Spouse constructed, I started researching new spice jars.

I knew that I wanted uniform spice containers that could be purchased inexpensively while still looking somewhat attractive. So where do you go when you need inexpensive and somewhat attractive? That's right: Ikea. That Swedish haven of goodness didn't let me down:

At a mere $3.00 per 4 jars, it was a match made in heaven. I then utilized those fabulous free printable labels from Better Homes and Gardens I mentioned yesterday, and hallelujah!


Once all of the spices were re-jarred and labeled, we loaded them into Mr. Spouse's superbly constructed hanging racks, and ended up with this:


Victory! Now, a spice cabinet I can actually use! All of the spices are within reach and easy to remove. Using the Ikea jars also allows me to buy those spices I use most in bulk and just refill the jars as needed. Pretty spice bottles and saving money? Absolutely! I just keep the bulk spice jars in my spice basket in the pantry until we need a refill.


Such a lovely new spice rack is a gem to look at, but also will boost me towards my ever-present goal of conquering all of Julia's divine dishes! Keep it spicy, y'all!


Saturday, January 21, 2012

pantry heaven.

I love to cook. Like really love to cook. It brings me complete and utter joy to be slicing, dicing, deglazing, and frosting. A day in which I do not set foot in my kitchen is a dark day. Being that I spend so much time in there, it was so important to me to create a neat, functional space where I could spend less time looking for the ingredients I need and more time sauteing.

When we first moved in, our pantry was fine, but it was by no means fabulous. Pulling out a can of black beans almost required a helmet to protect against other falling objects that had gotten in the way. It seemed that all the spices I needed were always on the very back row of my spice tray, meaning that getting to it meant knocking over every single spice in its way and then fishing those out of the trash can. Does anyone else have this problem? 

The pantry needed immediate attention. So, I started doing my research, and fell head-over-heels in love with this pantry from Better Homes and Garden. Plus, the site offered free, printable labels. Win-Win! 


But as I started looking at my own pantry, I realized I had so many oils, vinegars, baking goods, and other smaller items that I didn't think were worth putting in an entirely new, more uniformed container like the picture showed. That's when I came across Jen's pantry over at I Heart Organizing and noticed that she had uniform containers, but also incorporated baskets of her smaller items!


I had my solution! I knew that I could look for very uniform, stackable containers for my bulk baking items (flour, sugar, etc.), but incorporate large baskets to corral all of my smaller, but necessary bottles, packets, etc. Off to Wal-Mart I went! As always, I did not want this overhaul to wreak havoc on my wallet, so getting a pantry full of OXO containers, like Better Homes and Gardens, would have to wait.
At Wal-Mart, I found Rubbermaid's Modular Canisters would allow for me to stack my foods neatly while also allowing me to stay within my budget. I then found some taller containers for my cereal and pasta, and small, glass containers with screw-top lids for my salt, pepper, tea bags, and ground coffee. Now all I needed were the baskets! For those, I headed over to Target and found some Sterilite Stacking Baskets. Let the fun begin! 
After transferring all of my pantry items into their respective containers or baskets, this is what we ended up with:


The top shelf contains our cereals, pastas, breadcrumbs, and pancake mix.


The next shelf holds all of my bulk ingredients.


The next two shelves contain the baskets with oversized and miscellaneous ingredients that I did not want to put in new, stackable containers. The baskets are so easy to take out when I need the ingredients and have eliminated my need for a helmet when removing items.


And the bottom shelf contains our foils, clear wrap, chips, salt, pepper, tea, and coffee. We put our chips into clear, plastic bowls and have absolutely loved how fewer crumbs we have at the bottom of our chip bags!


I absolutely love our pantry! It met all of my needs: functional, colorful, and no more cascading cans when trying to find things I need! After everything was in its rightful container, it was time for my favorite part: creating labels. I created the outside circle design in Power Point, saved it as a .jpeg, and then went back to my trusty Word to insert the text. Feel free to download them below:


If you can't already tell, I find joy in the little things - my pantry is one of them. Having a functional, well-organized pantry makes cooking all the more blissful. Now, if only I could conquer Julia's Beef Bourguignon. 


Friday, January 20, 2012

a girl needs her space.

I don’t know about you, but I am a “station” girl. If I have a project or any task that needs accomplishing, I have to get out all of my tools, find a flat surface, and create my station. Since Mr. Spouse and I have been married, my station has been our dining room table. Awesome for a workspace, but terrible for, oh you know, eating. First apartments do not lend themselves to “stations” very well – it’s all about cramming everything we’ve both ever owned / stolen from our parents into an infinitesimal space.
Since I was stuck with the dining room table, I found myself daily laying out all of my work and project stuff on the dining room table then hurriedly clearing it away to share a meal with Mr. Spouse. Not ideal. We tried turning our guest room walk-in closet into an office area and workspace, but quickly realized we needed the added storage.
Ultimately, I decided that I did most of my work on the computer, so if I could just find an area for my computer, mail “catch-all”, etc. I could function. But where to put the computer? Sadly, for over 8 months, my computer sat here:
012
That’s right – poor Mr. MacBook sat underneath a chair. Are we seeing the problem? So, I gazed around the abode and set my sights on these:
           001
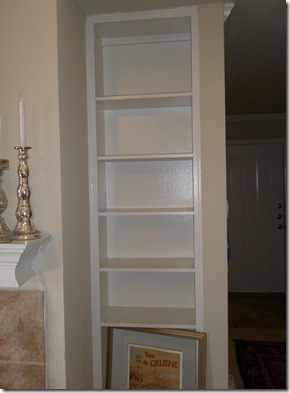
We have some really fantastic built-in shelves, but unfortunately, all of the shelves were full of:
          003
DVD madness. All of our DVD’s were taking up every single shelf. I could take the madness no more! That’s when I saw this post over at I Heart Organizing and knew that my solution was here! If I could just condense our DVD’s onto one shelf, I could have 4 fabulous shelves to play with! So I ordered these incredible DVD sleeves from Amazon, and got to work! And guess what – all of those DVD’s now fit perfectly here (Alphabetical dividers are still to come…):
       013
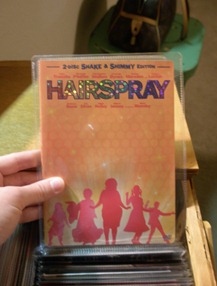
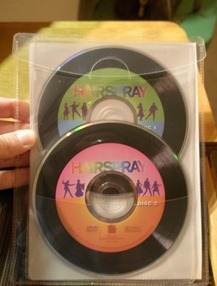
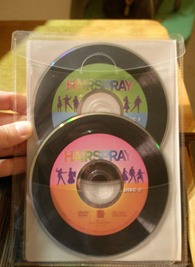
In ONE SINGLE BASKET! Hallelujah! The sleeves allow you to place both the DVD cover and 2 discs in one sleeve:
   015  019
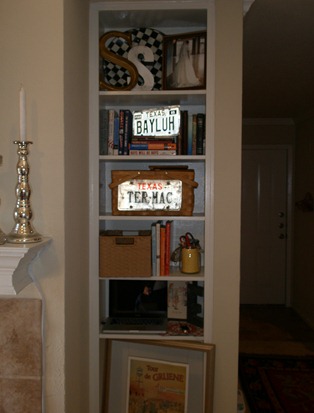
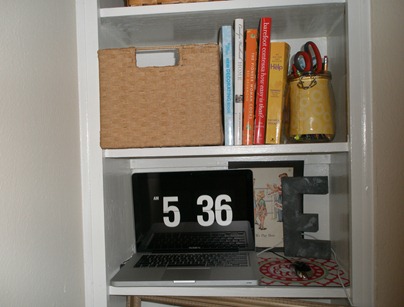
So now that our DVD’s were no longer eating up such fabulous shelves, I could get to work decorating and create me a small, but necessary, computer space. Here’s where we came out:
       007
The bottom two shelves now house my computer, our mail “catch-all” basket, and my favorite books, pens, etc.
       009
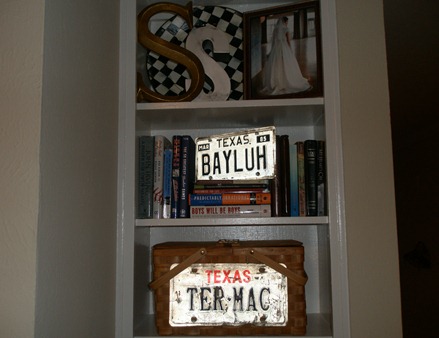
The next shelf holds our DVD picnic basket, which left me 2 shelves to decorate at my leisure – books, our dads’ license plates, wedding photos, and more!
010
I love love love the space! I know that my computer shelf is tiny, but at least it has a place to call home besides under a chair. I love feeling like all of my “stuff” is easily accessible (pens, scissors, tape, chargers, etc.) and ready to use. It helps to know that everything now has a home that is still tucked away and not intrusive.
What do we think? Are you a station person? Where do you like to do your work?
signature